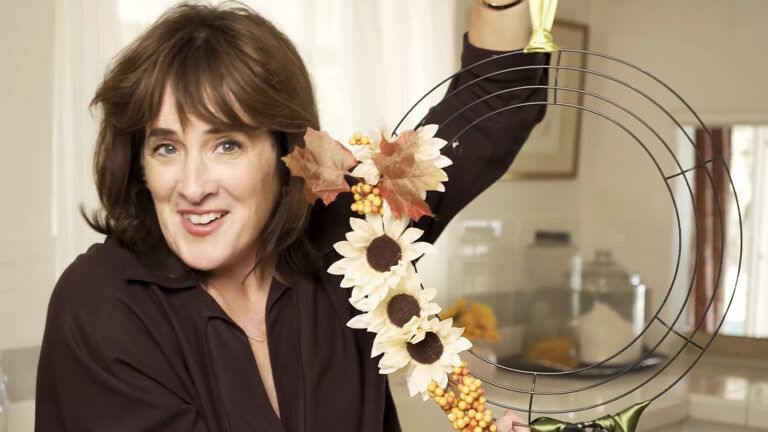
[UPBEAT MUSIC] Hi. I’m Diana. After you finish wrapping your Christmas gifts, do you ever find yourself surrounded by a mountain of Christmas bows and ribbons like I always do? Today, I’m going to show you how to make a beautiful Christmas wreath using all that leftover ribbon. It’s the perfect gift to give to someone who needs a smile this Christmas season, like an elderly neighbor or a sick relative or just someone who needs a little extra Christmas cheer.
So here’s what you’ll need. First, Christmas ribbons, all shapes and sizes. Anything that you have leftover from Christmas wrapping. You’ll also need a pair of scissors, sewing pins with the little ball-y on top. That way it’s like a stopper. When you put it in the ribbon, it stops the ribbon from going any further. You’ll use those to stick bows on the wreath.
And lastly, you’ll need a straw wreath. Now, I like to use a straw wreath because it won’t fall apart when you put pins inside of it, and we’re going to put the ribbons on the wreath using the sewing pins. You should keep the plastic wrapping on. That way, when you put the pins inside, the little straw pieces don’t shed everywhere.
So to start off, we’re going to need something to hang the wreath up. Otherwise, we would never be able to put it on the door. And we’re going to cut one long piece. And then take your wreath and tie the string around it. And we want to start off doing this. That way, when we cover it with bows, we can also cover our little handywork here. That way, nobody knows how it’s hanging up.
And then, on this end, we’re just going to tie another knot. So this is how we’re going to hang our wreath. So now look. Our wreath can hang. So the first thing you’re going to want to do is take your leftover ribbon and we’re going to cut little loops out of it to put all around the wreaths. We don’t want to do the back surface because, of course, we have to hang the wreath and we don’t want it to get all bunchy.
So first, take your ribbon. Just cut. It can be any size and you don’t have to be too particular. So now that you have your little loop, we’re going to start to cover the front surface of the wreath. So really, just pick a spot. Any place will do. You have your loop here. Take your sewing pin and just put it through the center of the ribbon and just press it down.
And see? Now we have a little bow already. That loop became a bow. And you can even fluff it out a little. You can jazz it up. As we fill in more ribbons, you’re going to have lots of clusters of them, so we can fluff it out more, even then.
Then, take a different kind of ribbon, a different texture, a different width, and just make another loop. So make sure that the loop goes all the way around. And we’re just going to put this little guy next to this one. Press it into the straw. Fluff it out to make a little bit of a bow.
You want to use a variety of ribbons in one section because if we do the same pattern or the same size, then it’s all going to look the same and it’s going to be kind of dull. So here I have a shiny green skinny ribbon, so I’m going to just make, again, a loop and I’m just going to put it maybe in the middle of these two guys. It adds some variety.
So if you cut the ribbon a little longer, you can get a little more creative and make a different kind of loop, a loop that has more than one loop. So see, we’re going to add two and three. And again, this is just going to add to the texture and give a little more variety.
So now, we’re just going to fill in all the sides and the front of the wreath. So again, just keep placing. Think about this first layer as the base layer, and then we’re going to add lots of little bows on the top. That way, it feels really full. So make sure that you keep the ribbons really close together. That way, there are no gaps. And the great thing about this wider ribbon is that it really covers a lot of surface area.
And the way to decide what to put where is to just balance the colors out. So if there’s too much green in one section, you might want to add a red ribbon. If there’s stripes in another section, maybe try polka dots or Santa print. So you want to do the front surface, the interior surface, but also this top side part all the way around because this is going to give us some height and depth. And these loops on the top can even be a little bit higher, if you want.
So just put the pin in. And as you can see, the pin is showing now, that little yellow ball-y. But we can completely cover it. We just fluff right over it. So at the end, when you have all the bows finally placed, just fluff the ends in a way so that you sort of cover it. See, when it’s at the top, this really gives it a nice background. And we’re in a want to do that all around the sides so that it really looks full of life.
Once you’ve filled in every nook and cranny, then you’re done. Oh my goodness. Look what we made. Fun and simple. A timeless Christmas treasure that everyone will love and enjoy. All that’s left to do is enjoy your wreath or give it to someone you love. Merry Christmas, everybody.
[INSTRUMENTAL MUSIC]