Conversations with Katie Brown
In this series of videos, the author and lifestyle expert offers some creative and affordable DIY home decorating tips and shares her thoughts on everyday blessings.
View Transcript
DIY Holiday Gift Wrap
Hi, I’m Katie Brown and thanks for joining me today, because today I want to walk you through a very simple, but pretty festive way to wrap up your gifts this holiday season. And this is a really fun project to do with your kids.
All you’ve got to do to make this wrapping paper is get yourself a big roll of white butcher paper, and you can get this at any kind of butcher shop or arts and crafts. I got it at a local grocery store who sells big to a lot of restaurant supplies.
And then I go to town with some cookie cutters. I take some cookie cutters, I take some painters pens, and I go along the outside kind of rough, kind of like painterly, or you can do it really specifically, if you want. Go all the way around the cookie cutter and kind of center the cookie cutters, wherever you’d like them to create kind of a pattern on your white package and color it in, if you want. Do some stripes on your candy cane or some ornaments on your Christmas tree, or maybe a star is the very tippy top of your Christmas tree.
And once you’re done with that, because I do a lot of shipping, I can’t do big fancy bows, plus ribbon can get expensive, so just get a collection of string. I have some green string, some red and white string, which is perfect for the candy canes. I have some orange ones, I have some yellow ones. It’s just little strings and rope, and I go a whole bunch of times around. You don’t even have to be a good bow tier and just tie it in a knot and voila, bada boom, bada bing, you got a gift wrap and I have some others here that are all finished and ready to be shipped out.
How much fun are these homemade, easy-to-make, cookie-cutter gift wraps? This is also a really great thing to do with your kids. You can roll out that white paper and put down all your different cookie cutters and they can pick out which holiday festive cookie cutter they want to trace. It’s quick, easy, so fun. My kids love it. Merry Christmas from my family to yours.
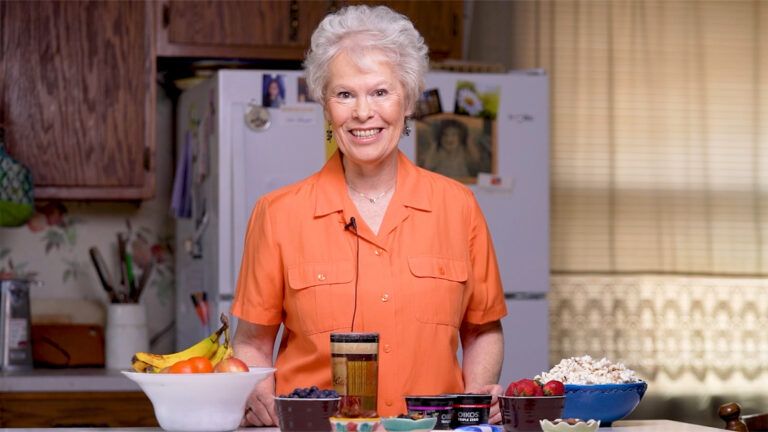
Thanksgiving Cornbread Loaves
Hi, my name is Katie Brown, and I am what they call a lifestyler.
So today I want to share with you one of my favorite Thanksgiving shortcuts of one of my favorite Thanksgiving treats. I’m going to show you how to dress up a boxed corn muffin mix. It’s perfect for a Thanksgiving feast fit for a queen.
It’s a simple and easy way to dress up a boxed cornbread mix. All you’ve to do is get your favorite cornbread mix. Right? That’s easy. Follow the directions on the box. And then you want to make it your own. You want to keep it moist. You want to have a lot of flavor. So I’ve experimented with a bunch of different things, and I’ve found the best thing to do is after you’ve mixed it up according to the box, put in a quarter cup of honey and a quarter cup of sour cream.
The sour cream is going to make it moist and not dry like some corn bread can be, and the honey is going to give it a little bit more of a sweetness. And you can switch the honey out for maple syrup, but I like honey better.
Mix that all together, and my cornbread mix comes with corn already added in. If it doesn’t, it’s not a bad idea at this point in time to mix in a half a cup to a cup of corn kernels, either frozen or fresh.
Mix it all together. And then you can either do this in a pan and make corn muffins or corn muffin squares, or you can do a muffin tin or you could do various molds. I think it’s fun to kind of make little tiny loaves. and I’m going to set a loaf, a little cornbread loaf, at each place setting. So when my guests come in, they’re going to see this loaf.
And to make it even more special, I’m going to put the loaf in a… well, I guess it’s like a french fry container that I got at a restaurant supply store or a hot dog container. It’s a recycled one. They’re very cool. I’m kind of that junkie who always goes to restaurant supply stores, or if I’m at any kind of store that might have something kind of different to serve food in, I tend to buy it. So I think this is a really fun way and a really fun kind of vessel to tie up and serve at your Thanksgiving table as part of your tablescape, if you will. All you’ve got to do to dress it up is tie a bow around it or tie a knot around it, and put it right in the center of your plate.
I love this. I think anybody who sits down at my Thanksgiving table might just want to give thanks for this little corn muffin. And I am certainly giving thanks because it’s a quick and easy shortcut that still has a lot of personality to it and is so classic and fills out any Thanksgiving meal. Happy Thanksgiving from my house to yours.
Rice Krispies Peanut Butter Cup Pumpkins
Hi, my name is Katie Brown, and today I want to share with you how to make a deliciously childlike dessert of Rice Krispie treats, with a peanut butter cup surprise in the middle, shaped like a pumpkin.
That’s right, I know it’s a mouthful, but let’s be honest, a lot of times at these holiday meals, verry sophisticated–pumpkin pie, pecan pie, not really kid-friendly desserts. Well, today I’m going to show you how to make the perfect pumpkin treat that every kid will delight in. Kids want to get excited about dessert, too.
It’s not that tough to make. All you’ve got to do is make some Rice Krispie treats, and that’s pretty easy. You just take a double boiler, melt down your marshmallows with a little bit of butter, then mix in your Rice Krispies, stir it all together till it’s nice and creamy.
While that’s happening, you want to start melting your candy melts and with the candy melts, in order to get it as liquid as you’d like it to be, or very frosting-like, you want to add in some coconut oil or any kind of vegetable oil will work, but I kind of like coconut oil because it adds just a tinge bit of flavor to the treat that I’m making.
Now you can buy candy melts in all kinds of different colors. Obviously, we’re creating pumpkins, so we want orange. I didn’t have orange candy melts, so I took white candy melts, added a little bit of gel food coloring, and if you take a little red and a little yellow, you going to get the orange you want.
Mix that in with your candy melts, stir that up until it gets nice and orange and kind of frosting-like, and in the meantime, take your Rice Krispie mixture off the heat so that it starts to cool. Once it’s cool, then you can take a scoop full of the Rice Krispie treats, put a peanut butter cup–that’s right, a peanut butter cup. As if it’s not exciting enough to get a Rice Krispie treat, this is a Rice Krispie treat with a peanut butter cup in the middle.
So take that peanut butter cup, put it right in the middle of your Rice Krispie treat, fold it around into the shape of a ball or in this case, a shape of a pumpkin. Once that’s done, you’re going to want to pop those on top of a cookie sheet lined with parchment paper, put that in your refrigerator. Let it sit for about an hour, an hour and a half until it gets nice and cool. Then take it out, frost it, or roll it around in your orange frosting.
Put that back in the fridge, so it gets nice and hard. It’s almost like you’re making a Rice Krispie cake pop, shaped like a pumpkin. Once it’s been in the fridge and the orange frosting gets nice and hard, pop it out again. And with a little bit of knife, just put a, create a little hole in the top of the pumpkin, where you’re going to put the stem. And then with some pretzels, I kind of break them up a little so that I can get kind of a curvy pumpkin stem-type feel, drive it into the center of your pumpkin. And then with a little bit of a frosting gel, create a couple of leaves. So you have a couple of green leaves on top.
To me, these little Rice Krispie peanut butter cup surprise pumpkins are a great way to make your kids welcome at any fall or Thanksgiving fete. Happy Thanksgiving from my house to yours.
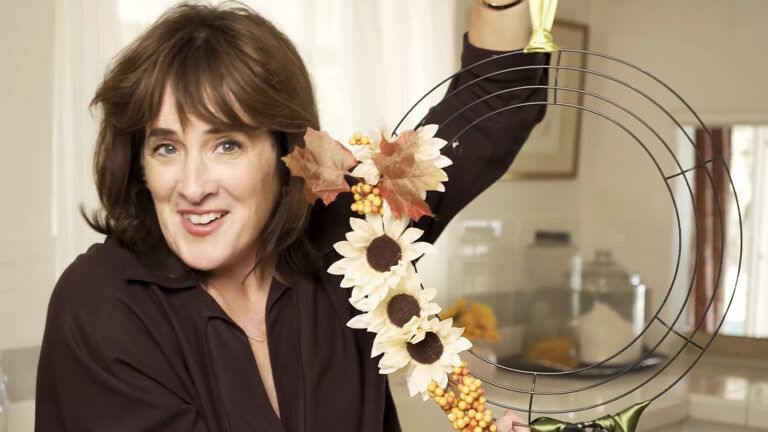
Tips for Thanksgiving Decor
Hi, I’m Katie Brown. Thanks for joining me today, because today I’m going to show you, well, one of my favorite things to do whenever I’m having a party and especially on Thanksgiving.
I love to create a tablescape that makes people go “Wow!” and is super creative and yet made out of kind of humble things that aren’t too expensive, and projects that don’t take too long.
So today we’re going to set a splendid Thanksgiving table. Today, because I feel like it’s kind of Thanksgiving-looking, I’m going to go with some really easy-to-bend copper wire. I’m going to create it like a little pumpkin name tag, and you want to get one piece to start your pumpkin that’s, I don’t know, maybe a foot and a half foot long and it’s really easy, you don’t have to be a sculptor to do this.
It’s just make yourself a round circle, and it can be a little misshapen because what pumpkin isn’t? And then with your two tails, that’s where you’re going to wind it and create your leaf, and your windy stem at the top, and if it gets warped, you can kind of twist it and turn it until you get it just the way you want it. Kind of cockeyed like a pumpkin looks.
And then with the tail, I’m going to take a pencil and wind it around. So you get a little bit of a natural kind of thing out of it, and you’ve got a real abstract little pumpkin there. And then to write your name, I am going to cut off just a green leaf with a little bit of a tail on it, so it looks like it just naturally grew on the top of my pumpkin, and with a paint pen. I’m just going to write the name of my guests.
In this case, it’s my mama, who we call Meg, which If you spell it backwards, it’s Gem, and she will never let you forget that her name is Gem. You could probably use a Sharpie for this or any kind of magic marker you have, and then I’m just going to kind of, oh, so gingerly put that leaf. And I’ve got a quick and easy way to let my mom, Gem, know where to sit. And it’s a little piece of art and it’s a little, little squash, pumpkin, apple, whatever kind of veggie you want. And that’s going to go right on my plate.
You might have some leftover pumpkins from Halloween, or you might walk into any of your grocery stores, which are selling pumpkins right now, and they make a great addition to any tabletop, and they last a lot longer than fresh flowers. You just want to dress them up a little bit. And I am going to do that by using some ribbon.
I’ve picked a color scheme that I think is kind of fun, it’s like orange, pink, and brown. I am using just thumbtacks, you can also use copper nails if you have them or upholstery, but they come in all kinds of great coppers and golds, which is kind of perfect for this project.
And you can choose any color scheme you want, you know, you could stick with all browns. You could do all kinds of maroons and oranges, and you can see that these thumbtacks and copper tacks kind of add a decorative bling to my pumpkin. Fun, right? But I’m not done, because these are going to go on the same table as my name cards I just made. I want to somehow incorporate that copper wire into the design of these pumpkins. And the way I’m going to do that is I’m going to take that pencil again and wrap, kind of make a tail, like a little branch for my pumpkin. And all you’ve got to do is just drive the end of your copper wire, right to the top of your pumpkin. And it looks almost like a natural little, little branch growing off the top of your pumpkin. And you’ll see when I put that on my table, it’s going to tie it in.
I like to do something fun with my silverware rather than just set it. So I think it’s fun to kind of form an X, X marks the spot, and I’m going to again use ribbon because I want to tie this all in. Yes, I am the ribbon lady. I am that person that cannot walk out of a craft store if there’s a bowl or a basket of ribbons that are for sale, I grab them. I grab all kinds of ribbons. I buy fake flowers, yep. I buy them, If they’re on sale, I buy them. Ribbons, I buy them, even if I don’t need the color. Someday I’m going to use it.
And just tie them in an X. I mean, you’ve heard of napkin rings for your napkins. Think of this as kind of a napkin ring for your silverware only It’s a tie. So now I have three kind of festive things to bring to my tabletop. I have my name cards, I have my pumpkins, all dolled up, and I have my X marks the spot. Now I’m going to put it all together and you’re going to see it’s a show-stopping tablescape that is perfect for a fun and funky Thanksgiving. Happy Thanksgiving from my house to yours.
Katie Brown’s DIY Sea-Glass Tableware
Ralph Waldo Emerson said, “Nature is too thin a screen, the glory of the omnipresent God bursts through everywhere.”
And I was running errands like a crazy person, like all moms do and…
Sea glass to me is like so summery and so lazy-hazy.
I had a list a mile long, I had my two girls in the back seat, I was driving along our main street in town, and our main street in town kind of parallels the beautiful Lake Michigan, and I was moving…
I love to think about these pieces of glass maturing in the lakes and the oceans and turning the great greens, and the great blues that they become.
And all of a sudden, as I’m making my way around the lake, and around the town, my little daughter shouted out, “Who poured that?”
I just think they’re magical.
Who poured that? And kind of without missing a beat, I said, “God did.” And I’m happy to say, at that very moment, my girls just carried on. They carried on as if they accepted that answer. They had enough faith in them to understand that, yeah, God did. No more questions, no more answers, just trusting the faith that God is a master.
I love the thought they’ve been out in the water, kind of maturing and turning into these beautiful shards of glass, and you bring it in and you bring it into your house and you do different things with it.
Well, now, even if you can’t get to a lake or an ocean, you can still have the beauty of sea glass right in your home. All you got to do is buy a couple of cans of sea glass paint and voila. You can spray almost anything with these great sea foamy colors.
To get started with this project, I going to take a couple of pieces of paper and some painter’s tape, and decide where I want my sea foam color to go. Let me hold that halfway up. And that way the paper and the tape is going to act as kind of my stencil. So that the sea foam color will just be on this part of the bottle. And now it’s just easy, I’ve shaken and spray it.
In all my hairy, crazy, errand-running, bad motherhood, I thought, ‘A-ha! Thank you God, I needed that!’ Because in that moment, I realized that even as a busy working mom, I had instilled in my girls enough faith, enough history in their belief in God To not question that answer.
I felt pretty good about that. And He basically gave me a high five, that I was doing okay as a mom. Yep, that day God poured a little more faith in me. How will you find God today? So that God can pour a little more faith into you.
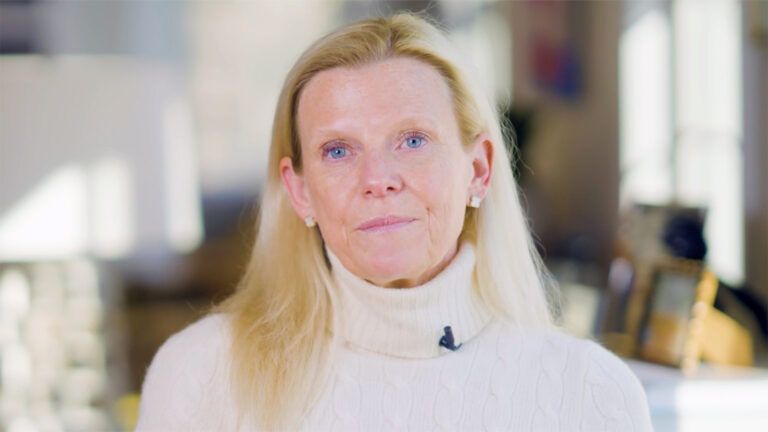
Katie Brown on the Everyday Blessings of Faith
Hi, my name is Katie Brown, and I’m a lifestyle expert. I like to think of myself as a lifestyler. And I am incredibly blessed because, for a living, I actually get to focus on all things cooking, gardening, and decorating, and how to turn your house into a home, and how to create family memories, and I mean, everything I love, I get to focus on every single day.
And I’ve made a bit of a pivot in my career, and my new book is all about God. It’s called Dare To See: Finding God in the Everyday. And it’s a collection of over 30 little short stories of moments in my life—oh gosh, I’m just trying not to get emotional—about moments in my life where I’ve been, you know, like touched by grace or had a moment of extreme feeling that God was right there with me.
And they’ve been in sometimes very small moments, sometimes very big moments. Sometimes, I’ve been really grateful to get them. Other times, I didn’t even wanna look at them, you know? I’ve been fortunate enough to be walking in my faith and with God since I was a little girl. Like, I don’t ever remember not having faith or not believing there was something bigger than me or something looking out for me or something taking care of me.
So I’ve always had this kind of ability, I guess, and habit of believing that nothing was an accident. And so in these stories or these moments or these events sometimes, like I said, sometimes tragic, sometimes hysterical, sometimes unbelievable, sometimes very ordinary, the book kind of runs the gamut. When I’ve had these moments, they’ve just always stuck with me and they’ve always informed kind of the way I live my life.
And so I guess maybe it’s getting older or maybe wanting to leave something behind that meant more than just—I mean, listen, I love arranging pine cones and coming up with a new chocolate chip recipe or a new frosting for a birthday cake, but all of that happens because I have this incredible faith that it’s all, for me, something deeper.
This story kind of takes you through those moments in my life, and each story starts with a Bible verse and then the story comes up and then, at the end, I ask you some questions like, you know, when have you ever walked out in nature and felt like you were singing along with all the birds in the trees? Or, you know, a question that has something to do with the story. And then I ask you to kind of reflect on how to strengthen that habit of daring to see and finding these moments in the way you walk through life. Because I think it makes it a little bit better and a little bit more special, and it’s certainly a less lonely way to go, for me.
Community Newsletter
Get More Inspiration Delivered to Your Inbox